Olive Salad

IMG_5343
Olive Salad

I don’t know about you, but fresh salads in the summer are one of my favorite things. Now just because it isn’t that time of year just yet, doesn’t mean I have to live off of “comfy” foods that are usually associated with winter. This salad is super easy to prepare and a favorite of my family. If you’re having a party, the recipe can easily be doubled. Also, I usually slice the olives or even prepare the olive mixture a day before to save myself some time if I’m making a larger salad. It may seem like an unnecessary step, but it really does save time when you’re trying to get ready for a party!  Just do not slice the tomatoes ahead of time as they don’t hold up as well!


  • 1 cup pitted green and black olives, halved (or one can of each)
  • ¼ cup chopped fresh parsley leaves
  • ½ teaspoon freshly ground black pepper
  • 5 tablespoons extra-virgin olive oil
  • 1 tablespoons capers, rinsed and drained
  • 2 tsp mince garlic
  • 8 fresh basil leaves, chopped
  • 1 cup balsamic vinegar
  • 2-3 tomatoes
  1. Place balsamic vinegar (or vinaigrette if you don’t want it quite as strong) in a small saucepan over low heat and allow it to reduce by half.
  2. Allow vinegar to cool to room temperature.
  3. Slice olives in half lengthwise.
  4. Combine olives, parsley, capers, garlic, basil, and pepper in a large bowl.
  5. Pour olive oil over olive mixture and toss to coat well.
  6. Slice tomatoes and place on plate, slightly overlapping.
  7. Spoon olive mixture over the tomatoes and drizzle with the balsamic vinegar
  8. Serve immediately


Roasted Artichoke & Red Pepper Salad

Roasted Artichoke Salad
Roasted Artichoke & Red Pepper Salad

Roasted Artichoke & Red Pepper Salad

Okay- I’ll admit it. I kinda sorta maybe love watching cooking shows on TV. Doesn’t everyone? Ina Garten is one of my favorites to watch because her recipes are pretty simple yet incredibly delicious. (Oh and in case you are confused so far- Ina Garten is otherwise known by the name of her show- Barefoot Contessa.)  The following recipe is based on hers but with a few little twists based on my own family’s taste preferences.  The dressing is yummy and the hardest part the recipe. That being said, I tend to make the dressing the day before just to make my day a little easier if I’m cooking for a large crowd. It saves a ton of time and makes your day easier! Also- the dressing is OMG delicious on its own. My husband likes to take slices of Italian bread and coat it with the dressing before tossing it in the oven for a few minutes. Delish!

Dressing:

  • 1 1/2 minced shallot
  • juice of 1 fresh lemons
  • 1 1/2 tsp dijon mustard
  • 1 1/2  tbsp white wine vinegar
  • 1 tsp salt
  • 1 tsp pepper
  • 12 fresh basil leaves
  • 3/4 cup extra virgin olive oil
  1. Place shallot, lemon juice, mustard, vinegar, salt, and pepper in a food processor and process for a few seconds.
  2. Add the basil and process again for an additional 5-10 seconds
  3. Slowly add olive oil while your food processor is running (if you’re using one without a pour lid, just make sure you process the dressing for a few seconds after adding the dressing to mix it well.

Roasted Red peppers

  • 3-4 red peppers
  1. Preheat the oven to 450.
  2. Place red peppers on a sheet pan and place in the oven for 20-25 minutes or until peppers are charred on all sides
  3. Remove from oven and allow to steam. You can place them in a paper bag and seal closed for 10 minutes, or take a large bowl and use it to cover peppers on the counter.
  4. Carefully remove skin from peppers
  5. Slice peppers
  • 1/4 cup olive oil
  • 1 tsp salt
  • 1 tsp pepper
  • 1 medium red onion, minced
  • 1tsp minced garlic
  • 1/2 cup fresh parsley, chopped
  • 1 tsp red pepper flakes
  1. Preheat oven to 350
  2. In a large bowl, add extra virgin olive oil, salt, and pepper. mix well
  3. Add artichokes to bowl and toss until well coated.
  4. Place artichokes on a sheet pan and place in the oven for 20 minutes. It is okay if they are touching, but make sure that there is only one layer of artichokes otherwise they will not roast evenly.
  5. Remove from oven and allow to cool for 5 minutes.
  6. Place in a large bowl and toss with dressing to lightly coat artichokes
  7. add red peppers, red onion, parsley, vinegar, and red pepper flakes.
  8. Let dish rest for 20-30 minutes to allow flavors to blend
  9. Serve at room temperature.

Enjoy!

xoxo

Caprese Salad

Caprese Salad
Caprese Salad

One of my friends asked which recipe was my “go-to” side dish when entertaining. She wanted something quick, easy, but that was going to impress her guests.  No problem! This caprese salad has always been a hit. Plus, there’s quick shortcut to this dish that I LOVE LOVE LOVE.

  • 1 container of grape or cherry tomatoes. Both work great!
  • 1 container of mozzarella bocconcini drained.  Just look by the mozzarella in your cheese department for the small balls of mozzarella. They are about 1/2 inch -1 inch round.
  • 3/4 cup extra virgin olive oil
  • 1 tsp oregano
  • 2 tbsp chopped parsley
  • 1 tsp salt
  • 1/2 tsp ground pepper
  • 2 tsp chopped thyme
  1. Combine extra virgin olive oil, oregano, parsley, salt, pepper, and thyme in a large bowl. Mix well
  2. Add mozzarella to completely coat. If you have time, allow mixture to marinate for a few hours with mozzarella
  3. Add tomatoes and toss.
  4. Serve immediately.

Okay ready for the easiest version ever? Most places will sell the mozzarella bocconcini already marinated in olive oil with all of these yummy spices. So grab yourself a large bowl. Empty the container of mozzarella and oil into the bowl, add tomatoes, toss gently, and serve. You’re done.

Enjoy!

xoxo

Honey Citrus Salad

honey citrus salad
honey citrus salad

Honey Citrus Salad

You can’t beat having fresh fruit available during the summer. It is one of the easiest snacks to grab on the go especially with the abundance of fresh fruit markets available during the summer months.  A fruit salad is an easy “go-to” treat to bring with for any summer party or even to keep on hand in your home!  The following recipe is super easy and quick to put together for those last minute parties or even for a snack for yourself. The dressing is easy to make and we keep it on hand in our refrigerator for a few days at a time since it keeps pretty well. I’m sure it would last longer than a few days but we’ve never made it past a week without running out!  All we have to do is grab a few handfuls of fruit and toss them with the dressing and you’re good to go! Now quick note- if you do not eat all of the salad in the first two days, things tend to get mushy and start to spoil. That is why we keep the dressing on hand and add it to fresh fruit as we need it!

Dressing:

  • 3/4 cup honey
  • zest of two limes
  • juice of two limes

Combine ingredients and mix well.  You can double this easily and save some for another day!

Salad

  • 2 cups strawberries- hulled & halved
  • 1 cup pineapple diced
  • 2 kiwis- sliced and quartered
  • 1 pint blueberries
  • 1 pint raspberries
  • mandarin oranges 12 oz

Combine fruit and toss with dressing. Add dressing slowly, making sure to cover fruit. If you add too much it will pool at the bottom of the bowl so be careful. Make sure to toss fruit before serving to allow juices to evenly disperse.

Enjoy!

xoxo

Sweet Irish Soda Bread

Sweet Irish Soda Bread

Okay I know it is not St. Paddy’s Day but this is one of my favorite recipes. I decided to make a batch this weekend because we are having a party at our house and wanted to have a homemade “sweets table” for our guests. Of course, I want it all gluten free for two reasons. First, and most importantly, I want to enjoy the treats and not worry about cross contamination! Secondly, I love proving to people that gluten free can be yummy. Now I wouldn’t necessarily do this for just any party, but some of the guests have celiac disease as well so I know that it will be appreciated by them! Oh and just a tip- if you decide to do bulk baking for parties or the holidays- Costco carries Namaste Perfect Blend Gluten Free Flour in HUGE bags. Woohoo!Soda bread is generally a “heavy bread” so this recipe works well gluten free since the flour usually tends to make things a bit heavier.

When you are ready to serve your bread, you can serve it with some butter as well. I usually heat it in the microwave for 10 seconds or so just to warm it up so the butter will melt. Clearly this won’t help your diet or healthy eating lifestyle, but sometimes you need to indulge!

Sweet Irish Soda Bread

  • 5 cups of flour
  • 1 ¼ cup sugar
  • 2 ½ tsp baking powder
  • ½ tsp salt
  • 1 tsp baking soda
  • ½ cup butter, softened
  • 2 ½ cups raisins
  • 2 ½ cups buttermilk
  • ½ cup heavy cream
  • 1 large egg
  1. Preheat oven to 350 degrees.
  2. Butter and flour a large cake pan (I use a large sprinform pan as this recipe is pretty big, but I also use two small cake pans occasionally to make smaller loaves)
  3. In a large bowl, combine your gluten free flour, sugar, baking powder, baking soda, and salt.
  4. Add raisins and mix again. This will help break up the raisins a bit so they are not in huge clumps since they tend to stick together.
  5. Add softened butter, eggs, buttermilk, and heavy cream slowly until well incorporated. To make this easier you can mix the wet ingredients together and then slowly pour them into the wet ingredients while mixing. Be careful to not over mix!
  6. Pour into your floured pan.
  7. Bake for 60-75 minutes, or until a toothpick comes out clean from the center of the loaf. If you made smaller loaves make sure you start checking them around 45 minutes because they will take less time to cook!
  8. Allow the bread to cool for 10-15 minutes before removing from the pan. Ideally you would then let it finish cooling on a wire rack, but I’ll be honest. I tend to dig in right about… NOW.

Enjoy!

xoxo

Gluten Free Lemon- Blueberry Cake with Lemon Cream Cheese Frosting

Lemon Blueberry CakeI think it is fair to say that my husband has a bit of a sweet tooth. I tried a new recipe for a gluten free blueberry cake a few weeks ago and, apparently, it was so good that my husband actually asked me to make it again for him- gluten free and all. Yeah, my kitchen is pretty much 90% gluten free, but occasionally I do make gluten containing foods more so if we are entertaining and well, I’m on a budget. Granted it also helps with my diet because I’m not tempted to eat those yummy treats either!  However, this cake works wonderfully gluten free! Oh and I should warn you- the frosting is addictive. I had made a bit extra last time I made this cake and it didn’t go to waste! (It was great on fruit, but straight off the spoon was amazing too!)

Lemon-Blueberry Cake with Lemon Cream Cheese Frosting

  • 3 cups gluten free flour (our favorite is Namaste Perfect Blend)
  • 2 cups sugar
  • 1 cup unsalted butter, softened
  • 1 ½ tsp baking powder
  • ½ tsp baking soda
  • ½ tsp salt
  • Zest from ½ lemon
  • 2 whole eggs
  • 3 egg whites
  • 3 tsp lemon extract
  • 2 tsp vanilla extract
  • 1 cup milk
  • ¼ cup sour cream
  • 2 tbsp lemon juice
  • 2 cups blueberries
  1. Preheat oven to 350 degrees
  2. Butter two 9 inch round baking pans and dust lightly with flour
  3. In a large mixing bowl, add gluten free flour, baking powder, baking soda, and salt. Stir until well blended.
  4. Combine milk, sour cream, and lemon juice in a small bowl and allow to rest.
  5. In a separate large bowl, combine butter, sugar, and lemon zest until fluffy.
  6. Add eggs, one at a time, into the butter mixture. Once well incorporated, add the lemon and vanilla extracts.
  7. Add half of the flour mixture and half of the milk. Repeat with the other half of the flour mixture and milk until well combined.
  8. Fold in blueberries.
  9. Divide batter into the two baking pans.
  10. Bake approximately 25 minutes (until a toothpick comes out clean)
  11. Allow to cool for 20 minutes before inverting onto a rack to finish cooling.
  12. Frost with lemon cream cheese frosting.

Frosting

  • 16 oz cream cheese (2 packages)
  • 1 ¼ cup unsalted butter, softened
  • 2 tsp vanilla extract
  • 1 tsp lemon extract
  • 4 ½ cups powdered sugar
  1. Using an electric mixer or a hand mixer, whip butter until fluffy.
  2. Add cream cheese and continue to whip until well blended.
  3. Add vanilla extract, lemon extract, and powdered sugar and blend until fluffy (this may take a bit so don’t be surprised if you’re still at it after a few minutes!
  4. Frost cake.
  5. Lick bowl. Seriously. It’s delicious.

Enjoy!

xoxo

Gluten free pumpkin pound cake

gluten free pumpkin pound cake

If you haven’t figured it out by now, my husband has a bit of a sweet tooth. In fact, he’s pretty much my go-to taste tester for these recipes because he is extremely picky when it comes to gluten free food. Now, a few weeks ago, he had a piece of pumpkin poundcake at his favorite coffee shop and kept talking about it. My mature response? Challenge accepted!

Pumpkin Pound Cake

  • 1 ¾ cups gluten free flour (again, Namaste Perfect Blend has been my go to choice)
  • 1½ cups sugar
  • ½ tsp salt
  • 1 tsp cinnamon
  • ½ tsp baking soda
  • ½ tsp baking powder
  • ¼ tsp cloves
  • ¼ tsp nutmeg
  • ¼ tsp allspice
  • ½ cup vanilla greek yogurt
  • 1 tsp vanilla extract
  • 3 egg whites
  • 15oz canned pumpkin
  1. Preheat oven to 350°
  2. In a bowl, combine your dry ingredients.
  3. In a separate large mixing bowl, combine sugar, yogurt, egg whites, and pumpkin.
  4. Slowly mix in the dry ingredients
  5. Pour into a greased loaf pan and bake for 75 minutes. Make sure you double check with a tooth pick! Pound cakes are more dense and can take a bit longer to cook through!
  6. Allow cake to cool completely before coating with glaze.

Glaze

  • 1 egg white
  • 2 cups powdered sugar
  • 1 tsp vanilla extract
  • 1-2 tbsp water
  1. Whisk egg white, vanilla, and 1 tbsp water
  2. slowly add powdered sugar to form a glaze. Slowly add the second tbsp of water if your glaze is too thick

Enjoy!

Pumpkin Spice Maple Cupcakes

Pumpkins Spice Maple Cupcake

Given that it is that time of year again, my husband asked if I would bake a batch of pumpkin cupcakes for him. However, his new request was for a different frosting than I had used last time. His suggestion this round was for a maple frosting like he had seen at a coffee shop and was craving. Well, after a few tries at the frosting, I think we found a winner! I stuck with the same recipe I’ve used before for the cake, and I’m still a huge fan of using the gluten free yellow cake mixes. There’s no thinking involved in figuring out flour combinations so take advantage of it when you can!

Pumpkin Spice Cake:

  • 1 box yellow cake mix (gluten free of course!)
  • 1 tbsp. pumpkin pie spice
  • 1 ½ tsp. cinnamon
  • 15 oz. pumpkin puree
  • 3 eggs
  • ½ cup vegetable oil
  • 2 ½ tsp vanilla extract

If you don’t have pumpkin pie spice on hand you can mix up a batch of your own! This will make 7 tsp of pumpkin pie spice so you will have a bit left over to use later!

  • 4 tsp ground cinnamon
  • 1 tsp ground nutmeg
  • 1 tsp ground allspice
  • 2 tsp ground ginger
  1. Preheat oven to 350 degrees
  2. Line pans with your favorite cupcake liners
  3. Mix together cake mix, pumpkin pie spice, and cinnamon and set aside
  4. In a large bowl, mix pumpkin, eggs, oil and vanilla extract until smooth
  5. Add cake mix/spice mixture slowly
  6. Fill cupcake liners to ¾ full and bake for 18-20 minutes. Keep a close eye on them though after 15 minutes to make sure they don’t burn!
  7. Allow cupcakes to cool completely before frosting!

Whipped Cream Cheese Frosting

  • 8 oz cream cheese, softened  (and no cheating with low fat versions here!)
  • 3 cup powdered sugar
  • ½ cup softened butter
  • 1 tablespoon maple syrup
  • 1½  teaspoon vanilla extract
  • ½-¾ teaspoon cinnamon
  • 8 oz heavy whipping cream
  1. Beat cream cheese, butter, and powdered sugar until smooth
  2. Add cinnamon, vanilla, and maple syrup
  3. Slowly add in heavy cream and continue to beat until stiff peaks begin to form
  4. Pipe onto cupcakes and enjoy!

enjoy!

XOXO

Review: Raw Generation Skinny Cleanse

IMG_3120.JPGI know I’ve been pretty MIA recently, but I have a fabulous excuse! I got married! Yay! Now, I’ll be honest here- I’ve been married now for a month. It’s been great, but it has completely taken a hit on my body! Between going out to eat and celebrating, not to mention being maid of honor in one of my best friend’s wedding last week, I haven’t been eating well at all. I’m pretty sure there has been a constant gluten exposure as well, but I haven’t quite figured out what the source has been. One of my friends recommended trying a juice cleanse for a few days and after researching a few, I decided to try the Raw Generation Skinny Cleanse. I honestly wasn’t planning on doing a cleanse after talking to my friend, but then suddenly came across a coupon code online. I figured this was a sign and, after all, it couldn’t hurt to try it. I have to admit though that I’m not very good with these diets. I’m from the Midwest and LOVE my meat and potatoes (and wine). Yeah, I use my nutribullet at home to make some yummy smoothies and “juice”, but not every day and certainly not for every meal.


Here’s the details on how this works! I decided to do a 5 day cleanse. They offer a 3 day one as well, but I decided if I was going to do this, I could make it for 5 days to get more benefit out of it. Now, there is also a 7, 10, and 14 day options as well for those more ambitious than I am. Could I make it 7 days? Probably, but I like to enjoy my weekends and having to keep the juice with me while running around with my friends does not sound fun and would probably not be worth it in the end for me. I know I would end up “cheating”and it would be a waste of money. I can behave Monday- Friday! 10 and 14 days? No way. Not gonna happen.


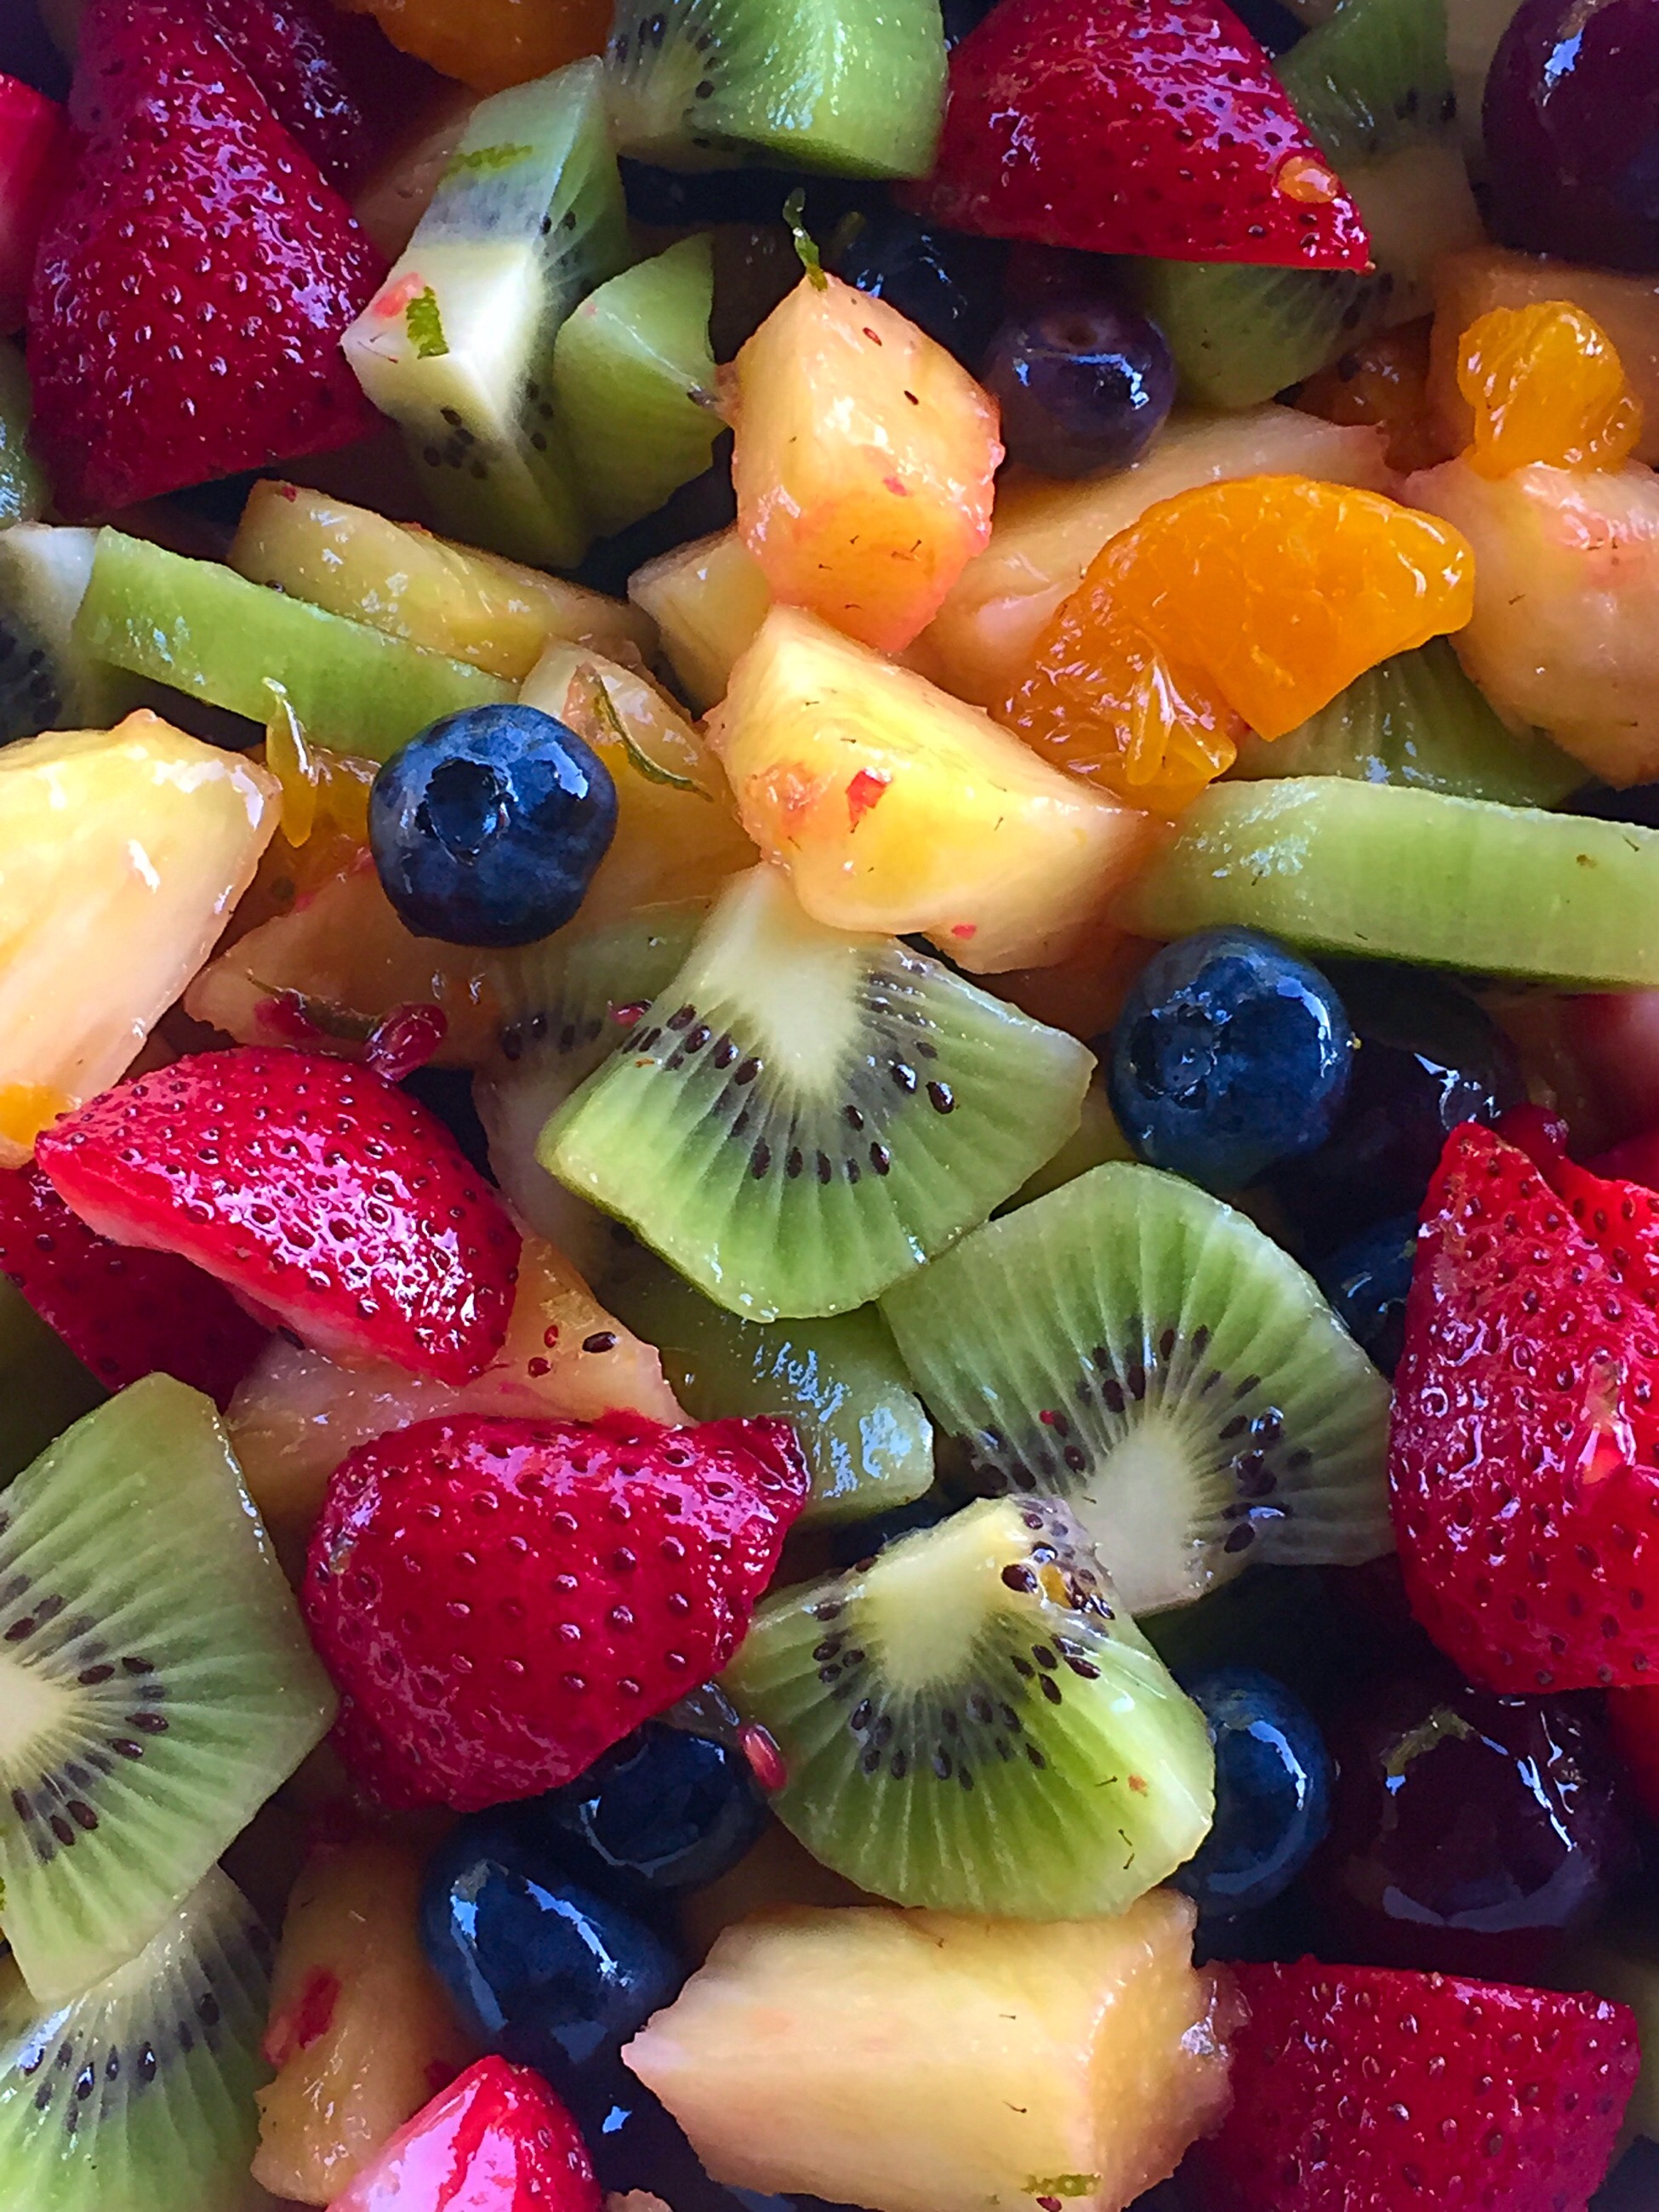
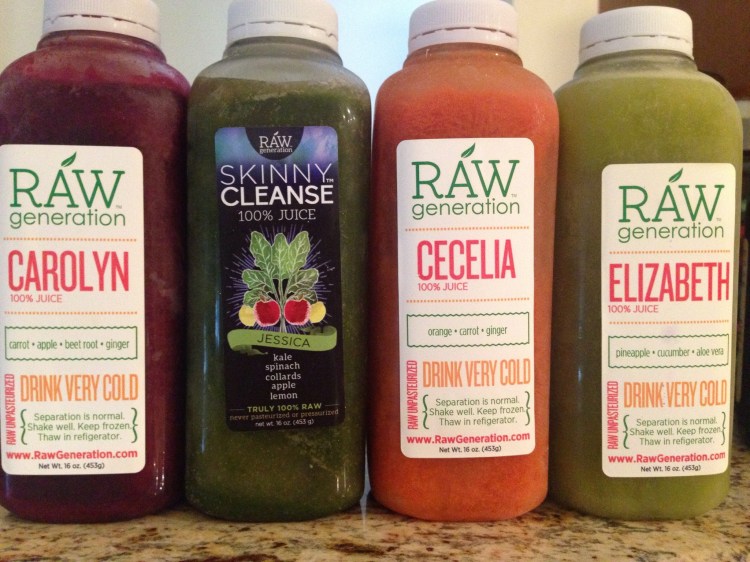
The plan requires you to drink 6 bottles of juice throughout the day and allows for you to eat fruit if you are hungry. The juices are named Jessica (which you drink 3 times/day), and Cecelia, Carolyn, and Elizabeth. It’s kinda cheesy but it’s better than reminding me what I’m drinking. The drinks are shipped to your house frozen so make sure you have room in the freezer to store them. I left mine in the freezer and took enough out for 1 day and put them in my “lunch box” for work. It says to eat them when they are very cold and after a few sips, I understand the biggest reason why. The can taste pretty nasty warm. Horrible. Eww. But when they are super cold they aren’t so bad!


  • Jessica: kale, spinach, colllards, apple, lemon
  • Cecelia: orange, carrot, ginger
  • Carolyn: carrot, apple, beet root, ginger
  • Elizabeth: cucumber, pineapple, & aloe vera


Day one:
Okay I will admit it was hard to drink them the first day. It took a bit to get used to the taste because I’m not a huge fan of all of the ingredients, but that comes with premade juices. By the time I got to the second serving of Jessica, though, it had started to grow on me. I did pretty good with Cecelia, but Carolyn and I are not friends. We never will be. I absolutely hate beet root. That being said, I pushed through it and managed to finish it. I usually had a glass of water along with the juice because it helped rinse the taste from my mouth (moreso with Carolyn than the others). I was hungry by the end of the day, but by no means was I starving. The six juices and extra water I had between servings had held me over until I got home from work. I did salivate a bit while my husband was making his own dinner, but I decided to take a hot shower and give myself a facial to distract myself. After a handful of grapes I was ready for bed.


Day two:
It was MUCH easier to make it through the day. Today Jessica didn’t seem so challenging and I was able to get through Cecelia and Elizabeth with no problems. Carolyn? Well, I finished most of it. I brought some fresh fruit to work to snack on since I was working late and when I finally went home I felt great. Not hungry at all and definitely still had some energy to do laundry. I should note that since the end of day one though I have been going to the bathroom like crazy. I swear I have to pee every 2 hours and today was no exception.


Day three:
Piece of cake! (Okay I wish there was cake, but at least the day is getting easier to get through). I didn’t feel hungry at all today and I managed to finish all of Carolyn today. It is important to remember when you are juicing or doing a cleanse, they are meant to have a nutritional benefit. They are NOT meant to fulfill your pleasure eating side of life. I will NEVER crave one of these drinks. Nope. I’ll save that for a vanilla milkshake. However, I could easily do these again. Today I haven’t had any sugar/salt cravings which I usually have after my midafternoon slump. I haven’t felt the highs/lows with my sugar during the day either. You don’t have to be diabetic for variations in sugar to start affecting your focus and energy level! It happens to everyone with their sugar highs! The higher you go, the harder you crash.


Day four:
I had the day off of work today which actually made the day go by faster because I had some errands to do. I’m not sure if it was the constant distraction of chores/grocery shopping/etc., but I didn’t feel hungry at all today. I some grapes for a snack after taking my dog for a walk, but otherwise the juices were pretty easy to get through (I’m even finishing all of Carolyn now, but I’m still on the fence about Elizabeth). I have to admit that I have noticed my pants are a little more comfortable lately (yeah the wedding celebrations may have made them a little more snug than they should have been!). I refuse to get on the scale though until I’m finished with all 5 days. I’d rather be driven by how I feel than by a number on the scale!


Day five:
Made it! Finally! Honestly, it wasn’t as bad as I was expecting it to be. I definitely had more energy throughout the day and did not experience my midafternoon slump after day one. I’ve tried juicing on my own for a few days and given up due to the hassle of having to clean my juicer/nutribullet/whichevergadgetisclean, not to mention the hassle of picking up fresh fruits/veggies , etc. The juices are decent. Again, like I said, I’d prefer a vanilla shake, but these weren’t so bad. They are a little “gritty” but I didn’t mind it after the first day. I prefer my juices to be strained, but you do lose some of the nutrients that way (I’m not a fan of pulp in my OJ either so it is just a personal preference). That being said, I would absolutely do this cleanse again. In fact, I’m probably going to order another round after my honeymoon!

XOXO

Gluten Free Bride- Bridal shower bliss!

Favors from my shower!

Now, the part that all girls look forward to- the bridal shower!  My mom was wonderful with making sure that I would be able to enjoy lunch with my friends and family without getting sick or just starving. Thank goodness for my mom!  She managed to run through the menu with the restaurant and came up with some delicious substitutions for me! If you haven’t noticed a theme with me just yet- I do not expect to live in a gluten free world. I don’t expect to live in a gluten free household either (unless I’m living alone but given that my fiance and I just bought a house together, that ship has sailed!). Some have voiced their opinion about this and brought up fears of cross contamination and extra “work” involved, but it works for me.  I did not expect, nor want, a completely gluten free shower.   Here was how everything was broken down:

Appetizers:

  • Caprese salad- super easy! Sliced tomatoes, mozzarella, basil, balsamic vinegar!
  • Pizza- totally not gluten free, but it is a family favorite at this restaurant and wanted everyone to enjoy their day out as well!

Dinner:

  • Salad- no croutons, gluten free dressing!
  • Sausage & Peppers: I passed because I didn’t know if the sausage was safe
  • Chicken vesuvio with roasted red peppers: They did not use flour to brown the chicken so it was 100% safe for me!
  • Mostaccioli- not gluten free for everyone else but they did have a gluten free pasta they prepared for just me with a marinara sauce! Delicious!

Dessert:   An amazing dessert table prepared by my mom and my Aunt Mary (thanks guys!)

  • Gluten free cupcakes from my favorite cupcakery!additional non-gluten free cupcakes but everything CLEARLY LABELED
  • Chocolate covered strawberries
  • Chocolate covered pretzels (not gluten free but could be if you used GF pretzels!)
  • Cannoli cake- not gluten free but one of my fiancé’s favorite cakes
Nutella and Tiramisu cupcake jars!

And of course- the gluten free cupcakes in a jar that were sent home with each guest. I prepared the cupcakes myself and they turned out to be AMAZING! I would make these in a heartbeat for the next shower/birthday/whatever I’m hosting!

Hope this helps you get started on your gluten free wedding preparation! My biggest tip though is to try to stay calm and just have fun with it! If you’re looking for 100% gluten free you may be making things too difficult for yourself, especially if you are hosting a big wedding or other event!

Oh- and while we are on the topic of bridal showers, I hope you all remember to have fun with your registry!  Now, if you’ve read my gluten free kitchen blog, you would know that not EVERYTHING needs to be gluten free. However, since it was our shower and a time to indulge a bit, we registered for duplicates of certain items. We are fortunate to have a large kitchen so we did register for duplicate items- one to be gluten free and one for gluten containing foods. Yeah, I know- my crock pot doesn’t need to be gluten free. He can make his chili and I can clean it out and use it to make my gluten free version. However, what happens when we are hosting a party (which we do frequently)? With two crock pots we can have gluten free versions available as well! All you need are gluten free labels and you are good to go! Trust me; it makes things so much easier when you’re cooking for large groups! We did make sure to register for two colanders as those should be kept gluten free since they can be difficult to clean. Come on, spoil yourself. This is the only time in your life that you get to tell people what you need!

xoxo